Tuesday, December 9, 2008

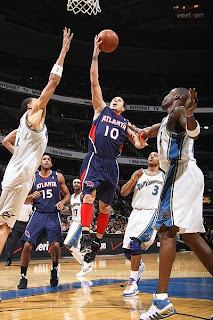
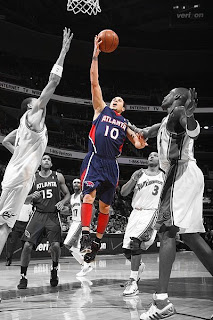
Painting Away Color QZ


Painting Away Color Tutorial


step1: Open the image you would like to work on. Apple+J.

step2: Click on the brush tool in the Options Bar, switch the Blend Mode to color. Change your foreground color to black.

step3: From the brushes palette, choose a medium sized, soft-edged (o% Hardness) brushes.

step4: Start painting. As you paint, the color will disappear leaving your image in grayscale.

Wednesday, December 3, 2008

Gold Chrome Tutorial

Step1 : Type your text. Put a selection around your text.

Step2 : Go under the Select menu and choose Save Selection. Click OK. Deselect your text. Delete your type layer.

Step3 : Go to the Channels palette, Click on Alpha 1. Go under the filter menu, under Blur, choose Gaussian Blur. Enter 1 pixel.

Step4 : Return to the layers palette and click once on the background layer. Go under the filter menu, under Render, and choose Lighting Effect. Under the texture Channel option, Choose Alpha 1. Click OK.

Step5 : Go under the image menu, under Adjustments Curves. Create a curve. (Input 186. Output 64) Click OK.

Step :Go under the select menu and choose load selection. Choose Alpha 1 from the Channel pop up menu. Click OK. Go under the Select menu, under Modify and choose Expand. Enter 3 pixels. Click OK.

Step7 : Press Shift +Apple + J. Click on the background layer Press Apple + A, then press delete. Deselect. Click on your text layer, Choose drop shadow from the layer styles . Change the blend mode to Overlay then click the color swatch and use the following.

R= 208
G=165
B=16
CLICK OK !!!!!!

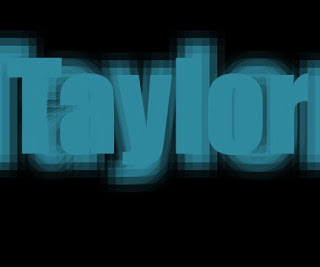
Shadow In Motion Tutorial


Step1 : Tap the letter "d" to change the foreground color to black. Hold down the option key and tap the delete key. Type your text using a medium gray color (#666666).

Step2 : Duplicate your type layer by using the Apple + J short. Rasterize your layer.

Step3 : Go under the filter menu, under Pixelate, choose fragment. Run this filter two more time by using the Apple + F shortcut.

Step4 :Press Apple + T. In the options bar change the width + height to 130%.

Step5 : Click on your original type layer and rasterize it. click on the top layer and press Apple + E to merrge the 2 layers.

Step6 : To colorize your type, press Apple + U to bring up the Hue/Saturation. Click the colorize checkbox and make and make the Hue slider to the color you'd like.

Shadow In Motion Tutorial

Photoshop Shortcuts

Apple + U - Hue and Saturation

Apple + T - Free Transformation

Option + Delete - Changes color of the image to your foreground

Apple + J -Duplicate Layer

Apple + E - Merge

Apple + F - Run the last filter

Apple+Z = Undo

Apple+X = Cut

Apple+C = Copy

Apple+V = Paste

Apple+N = New Document

Apple+A = Select All

B = Brush Tool

Apple+S = Save

Apple+D = Deselect

Ctrl + click layer = Rasterize layer

Apple + Click Layer = put selection around your text

X = Switch your foreground to whatever your background color is

T = Type Tool

D = Foreground color black Background color white